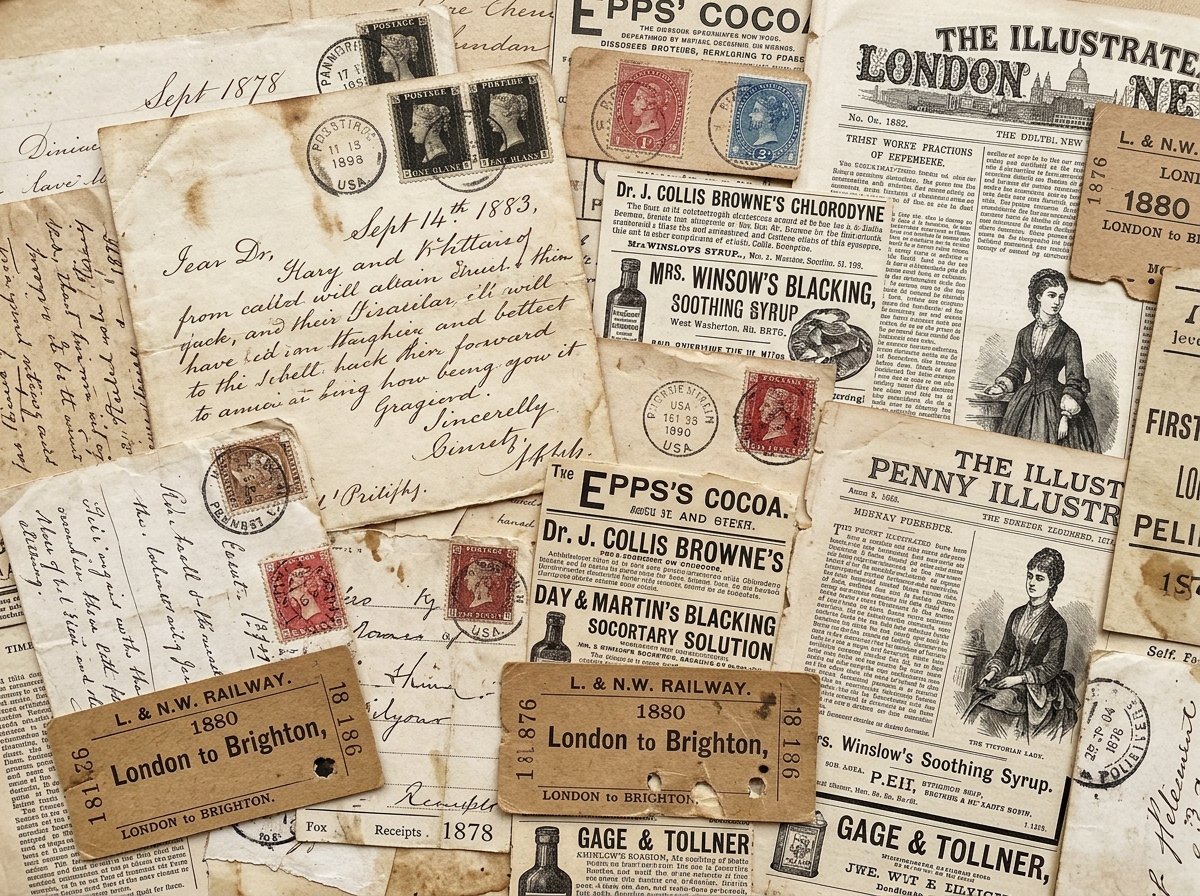
Step-by-step masterclass on designing authentic vintage French ephemera tags: harness modern graphic design software (Photoshop & Affinity Designer), restored 19th-century Parisian manuscripts, antique calligraphic receipts, and French botanical engravings to create heirloom-quality printable tags for junk journals. Features embedded video process and links to curated ephemera kits.
> **Quick Summary:** By merging modern graphic design software (Photoshop & Affinity Designer) with authentically restored 19th-century French manuscripts, high-resolution botanical engravings, and tactile distressing techniques, you can craft heirloom-quality **vintage French ephemera tags** that captivate paper crafters and junk journal collectors. Explore our step-by-step masterclass, watch the hands-on process video, and discover ready-to-print designs in our curated [Printable Cards, Tags & Ephemera Collection](/category/ephemera).
https://youtube.com/shorts/Q4rgjHD5v_8?feature=share
---
## 1. The Timeless Appeal of the Vintage French Ephemera Tag
Few paper artifacts evoke romantic nostalgia quite like an authentic **vintage French ephemera tag**.
Whether tucked into a tea-stained junk journal pocket, tied with silk sari ribbon around a handcrafted gift, or displayed as an altered art embellishment, French tags hold a special prestige in the mixed-media and scrapbooking world. The unmistakable elegance of Parisian typography, aged postal postmarks (*timbres à date*), iron gall cursive calligraphy, and subtle sepia patina gives each tag an undeniable soul.
For years, paper crafters relied either on scarce and fragile antique originals sourced from Parisian flea markets (*marchés aux puces*) or on flat, generic modern clip art that lacked historical depth.
Today, by pairing modern digital design technology with high-resolution archival restorations and a dash of creative layering, you can design stunning, bespoke French ephemera tags from the comfort of your studio.
Ready to start crafting right away? Explore our instant-download printable [Cards, Tags, & Ephemera Collection](/category/ephemera), or customize your own tags in your browser with our free [Interactive Ephemera & Tag Builder](/ephemera-builder).
---
## 2. The Four Pillars of Authentic French Ephemera Design
To create tags that look genuinely historical rather than digitally generated, you need to master four essential design pillars:
### 1. The Textured Archival Substrate
Antique French paper from the 1800s was crafted from linen and cotton rag fibers (*papier vergé*). It features subtle wire grid chain-lines, natural fiber inclusions, water spots, and gentle edge browning caused by natural oxidation over 150+ years.
* Avoid plain yellow backgrounds; instead, use authentic high-resolution scans of tea-dyed parchment, vintage ledger margins, or aged document endpapers.
### 2. Authentic 19th-Century French Typography
Historical French printed matter possessed a very specific typographic hierarchy:
* **Headings:** High-contrast neoclassical Didone typefaces (Didot, Bodoni) with dramatic contrast between thick vertical stems and hairline serifs.
* **Secondary Labels:** Condensed French grotesque woodblock fonts or classic French Clarendon.
* **Body Text:** Flowing French cursive scripts (*Ronde française*, *Bâtarde*, or English copperplate calligraphy written with a flexible steel dip pen).
### 3. Iconic French Ephemera Motifs
Authentic French tags incorporate identifiable historical graphic elements:
* **Factures & Invoices:** Heading banners reading *“Maison Fondée en 1874”*, *“Fabrique de Soieries”*, or *“Comptoir Général”*.
* **Postal Marks & Revenue Stamps:** Circular Paris cancellation stamps, French fiscal tax stamps (*timbres fiscaux*), and cancelled postage stamps featuring the Ceres or Marianne silhouettes.
* **Apothecary & Botanical Details:** Redouté-inspired botanical roses, medicinal herbs, and apothecary dosage banners (*“Usage Externe”*).
* **Currency & Numbers:** Vintage Franc signs (F, Frs) and stamped serial numbers.
### 4. Physical Finishing & Hardware
A true French tag is not finished when it leaves the printer. It comes alive through tactile touches:
* Angled chamfered top corners.
* Brass or copper eyelets (grommets) reinforcing the string hole.
* Manila or Kraft paper reinforcement washer rings.
* Antique seam binding ribbons, frayed linen thread, or waxed twine.
---
## 3. Video Masterclass: Crafting French Ephemera Tags in Action
Watch our hands-on process video showcasing the physical layering, distressing, and assemblage of vintage French ephemera tags:
https://youtube.com/shorts/Q4rgjHD5v_8?feature=share
Notice how combining multi-layered archival elements—such as vintage French scripts, layered tags, tea-stained lace trims, and distressed ink edges—creates a three-dimensional depth that draws the viewer into the past.
---
## 4. Designing in Adobe Photoshop: The Layer Blending Masterclass
Adobe Photoshop is the gold standard for creating rich, textured French tags because of its unmatched non-destructive raster blend modes and adjustment layers.
### Step 1: Document & Canvas Setup
1. Create a new document: **8.5 x 11 inches** (US Letter) or **210 x 297 mm** (A4) at **300 DPI** (Pixels/Inch).
2. Set Color Mode to **RGB Color (8-bit)** with sRGB IEC61966-2.1 profile. (RGB preserves the richest sepia and tea-dye saturation; you can convert to CMYK before commercial press if required).
3. Set margins of at least 0.5 inches (12.7 mm) to prevent home printer border clipping.
### Step 2: Drawing the Tag Silhouette & Clipping Mask
1. Select the **Rectangle Tool (U)** and draw a tag base (e.g., 2.5 x 4.5 inches).
2. Use the **Polygon Lasso Tool** or the **Corner Radius Tool** to snip 45-degree angled corners at the top left and top right (typically 0.4 inches).
3. Convert this shape layer into a Smart Object and rename it 'Tag Silhouette Mask'.
### Step 3: Layering the Antique Paper Texture
1. Place a high-resolution scan of authentic 19th-century French parchment or tea-stained paper above the tag silhouette.
2. Right-click the texture layer and select **Create Clipping Mask** (Alt+Ctrl+G / Option+Cmd+G). The texture is now confined strictly within the tag shape.
3. Add a **Curves Adjustment Layer** (also clipped) to deepen the shadows and warm up the parchment highlights.
### Step 4: Isolating and Inking French Archival Scripts
1. Open a scanned 1800s French invoice (*facture*) or handwritten letter.
2. Go to **Image > Adjustments > Levels** and pull the white slider to the left until the original yellowed paper turns pure white (#FFFFFF).
3. Set the layer's Blend Mode to **Multiply**. The white paper background disappears completely, leaving only the dark French script!
4. Add a **Color Overlay** layer style set to deep walnut brown (`#2C221E`) or antique indigo (`#1F2430`) at 85% opacity to soften harsh digital black into authentic historical ink.
### Step 5: Incorporating Botanical Engravings & Postal Marks
1. Place a vintage French botanical rose engraving or Pierre-Joseph Redouté lily onto the tag canvas.
2. Use the **Multiply** or **Linear Burn** blend mode so the subtle paper grain underneath shows through the translucent watercolor petals.
3. Stamp an authentic circular Parisian postmark (*Paris R.P. Départ*) in the upper corner. Reduce the postmark layer opacity to **75%** and use a textured grunge eraser brush to create authentic aged stamp dropouts.
---
## 5. Designing in Affinity Designer: Vector Precision Meets Textured Art
For creators who prefer vector cutlines and dislike subscription software, **Affinity Designer** offers a phenomenal hybrid vector/raster workflow.
### Step 1: Document Setup in Designer Persona
1. Create a new document: **Letter or A4** at **300 DPI**.
2. Work in the **Designer Persona** to create crisp vector templates.
3. Use the **Rounded Rectangle Tool** with corner type set to *Straight* (Chamfer) to create tag outlines with perfectly symmetrical 45-degree corners.
4. Draw a small 0.2-inch circle at the top center to represent the eyelet punch hole.
5. In the stroke panel, set a 0.5pt dashed stroke in soft sepia to serve as an optional cutting guide for your customers.
### Step 2: Switching to Pixel Persona for Distressing
1. Switch to the **Pixel Persona** (the raster workspace inside Affinity Designer).
2. Drag your antique French manuscript texture into the document and drag its layer *inside* the vector tag shape layer to nest it as a clipping mask.
3. Select the **Paint Brush Tool** with a grunge or distressing brush from the Daub or dry media brush pack.
4. Set brush color to deep sepia (`#3B2A1E`) and opacity to **30%**.
5. Brush gently along the outer edges of the tag to simulate the natural friction wear and finger grime accumulated from handling over a century.
---
## 6. Curating Authentic 19th-Century French Assets
Where do you find authentic, copyright-free historical French documents? Here are our archival studio's top recommendations:
| Asset Source | Type of Ephemera | Usage & Copyright Notes |
| :--- | :--- | :--- |
| **Bibliothèque nationale de France (Gallica)** | Authentic French invoices, legal deeds, fashion gazettes, and maps. | Public domain; incredible repository for 18th and 19th-century French manuscripts. |
| **New York Public Library Digital Collections** | French menus, theater programs, perfume labels, and trade cards. | High-resolution public domain downloads available without restriction. |
| **Biodiversity Heritage Library (BHL)** | Exquisite hand-colored French botanical engravings (Redouté, etc.). | Free, public domain 300 DPI botanical plates. |
| **Ephemera Crafts Curated Kits** | Ready-to-print 300 DPI French ephemera sheets, fussy cuts, and tags. | Professionally color-balanced with commercial craft license included. |
---
## 7. Printing & Physical Crafting: Bringing Digital Tags to Life
Once your digital design is complete, printing and tactile finishing transform paper into authentic heirlooms:
### 1. Paper Selection
* **Best Choice for Tags:** **65lb to 80lb (176–216 GSM) Smooth Matte Cardstock**. Heavy enough to hold its shape in pockets without warping when inked or glued.
* **Vintage Look Alternatives:** Kraft cardstock, light cream vellum Bristol, or 100% cotton rag paper.
* Avoid glossy photo paper—gloss reflects light unnaturally and prevents distress inks and glues from adhering.
### 2. Printer Calibration & Resampling
* When printing from PDF or image viewers, always select **"Actual Size" (100% Scale)** to prevent blurry page-fit distortions.
* In your printer dialog, set Media Type to **Matte Presentation Paper** and Quality to **High / Best**.
* Ensure your image software used **Bicubic Sharper** resampling during downscaling to keep fine French script needle-sharp. (For a deep dive on why this matters, read our guide on [Bilinear vs. Bicubic Resampling for Junk Journal Printing](/blog/bilinear-vs-bicubic-printing-junk-journal-ephemera)).
### 3. Tactile Distressing & Finishing Techniques
* **Edge Inking:** Take an ink blending tool with **Tim Holtz Distress Ink in "Vintage Photo" or "Walnut Stain"** and lightly brush along the tag edges at a 45-degree angle. This eliminates the stark white paper core revealed by your scissors.
* **Eyelet Installation:** Punch a 3/16-inch hole at the top marker using a Crop-A-Dile or hole punch. Insert an antique brass eyelet and set firmly.
* **Frayed Silk Ribbons:** Thread crinkled seam binding, vintage lace trim, or baker's twine through the eyelet. Dip ribbon ends in strong black tea for an instant aged tint.
* **Wax Seals:** Stamp a miniature fleur-de-lis or monogram wax seal in antique gold or deep burgundy wax at the bottom corner for Parisian luxury.
For our full list of tested scissors, eyelet tools, distress inks, and archival glues, visit our [Recommended Crafting Supplies Guide](/supplies).
---
## 8. Summary & Next Steps
Creating authentic **vintage French ephemera tags** is an extraordinarily rewarding fusion of digital craftsmanship and physical artistry. By understanding historical paper characteristics, respecting 19th-century typography, and applying thoughtful digital blend modes in Photoshop or Affinity Designer, you can produce printable collections that rival antique originals.
Ready to expand your vintage paper crafting?
* **Browse Instant Download Printables:** Discover our 300 DPI [Printable Cards, Tags & Ephemera Kits](/category/ephemera).
* **Scan & Compress Book Pages:** Check out our guide on [How to Scan and Reduce the Size of Colored Pages from Old Books](/blog/how-to-scan-and-reduce-size-colored-pages-old-books).
* **Age Scanned Newspapers & Cards:** Master digital patina in [How to Give Scanned Old Newspapers and Cards a Vintage Look](/blog/how-to-give-scanned-newspapers-cards-vintage-look).
* **Learn More About Historical Paper:** Read our definitive guide on [What Is Ephemera? The Complete Guide to Paper Ephemera in Junk Journaling & Crafting](/blog/what-is-ephemera).
* **Generate Custom Pages:** Create matching vintage stationery using our [Planner Page Generator](/planner-generator) and [Journaling Lines & Grid Maker](/lines-grid-generator).